I made these quite a while ago, but life happened and it's only now that I get the chance to write about it. Originally I was thinking of a 2018 Make Nine list for my shop Cotton Candy, but then found out that it's not practical, I want to make things spur of the moment as new fabrics come in for example...So after sewing 3 items from that list (these jeans, the simple top and a T-shirt dress coming out next spring as it's not weather appropriate in Norway right now) I decided to drop the list.
Or old neighbor...that settled down and fell in love with cats and various hand crafts :)
Showing posts with label how-to. Show all posts
Sunday, 21 October 2018
Red skinny jeans
I made these quite a while ago, but life happened and it's only now that I get the chance to write about it. Originally I was thinking of a 2018 Make Nine list for my shop Cotton Candy, but then found out that it's not practical, I want to make things spur of the moment as new fabrics come in for example...So after sewing 3 items from that list (these jeans, the simple top and a T-shirt dress coming out next spring as it's not weather appropriate in Norway right now) I decided to drop the list.
Wednesday, 1 August 2018
My favorite summer top
Click here for Norwegian
A bit after I opened Cotton Candy, I decided to make a 2018 Make Nine list for Cotton Candy as well. There were a few reasons for that:
- I wanted to showcase some of the nice fabrics I have (obviously).
- I wanted to inspire sewists in Norway (and maybe outside of Norway too) to make their own pretty clothes and not limit themselves to a difficulty level thinking some project or other is hard.
- I wanted to make video sew-alongs that show the process of creating a few garments step by step, again to show that anybody can do it.
Monday, 16 July 2018
Create pleated bell sleeves
To add bell sleeves at the bottom of your sleeves gives them a very pretty shape and isn't difficult to do. Here's a way to achieve them:
- Measure the circumference of the bottom of your sleeve.
- Decide how many pleats to have. I used nine on my version and think it works really well.
- Now divide the circumference of the sleeve by the number of pleats to get the pleat width A.
- To get beautiful even pleats, you need two strips of fabric equal to 3xA + seam allowances in length, and about 12-15cm + seam allowance to sew into the sleeve + hem allowance in width.
Saturday, 14 July 2018
Modify a rounded hem to a straight hem
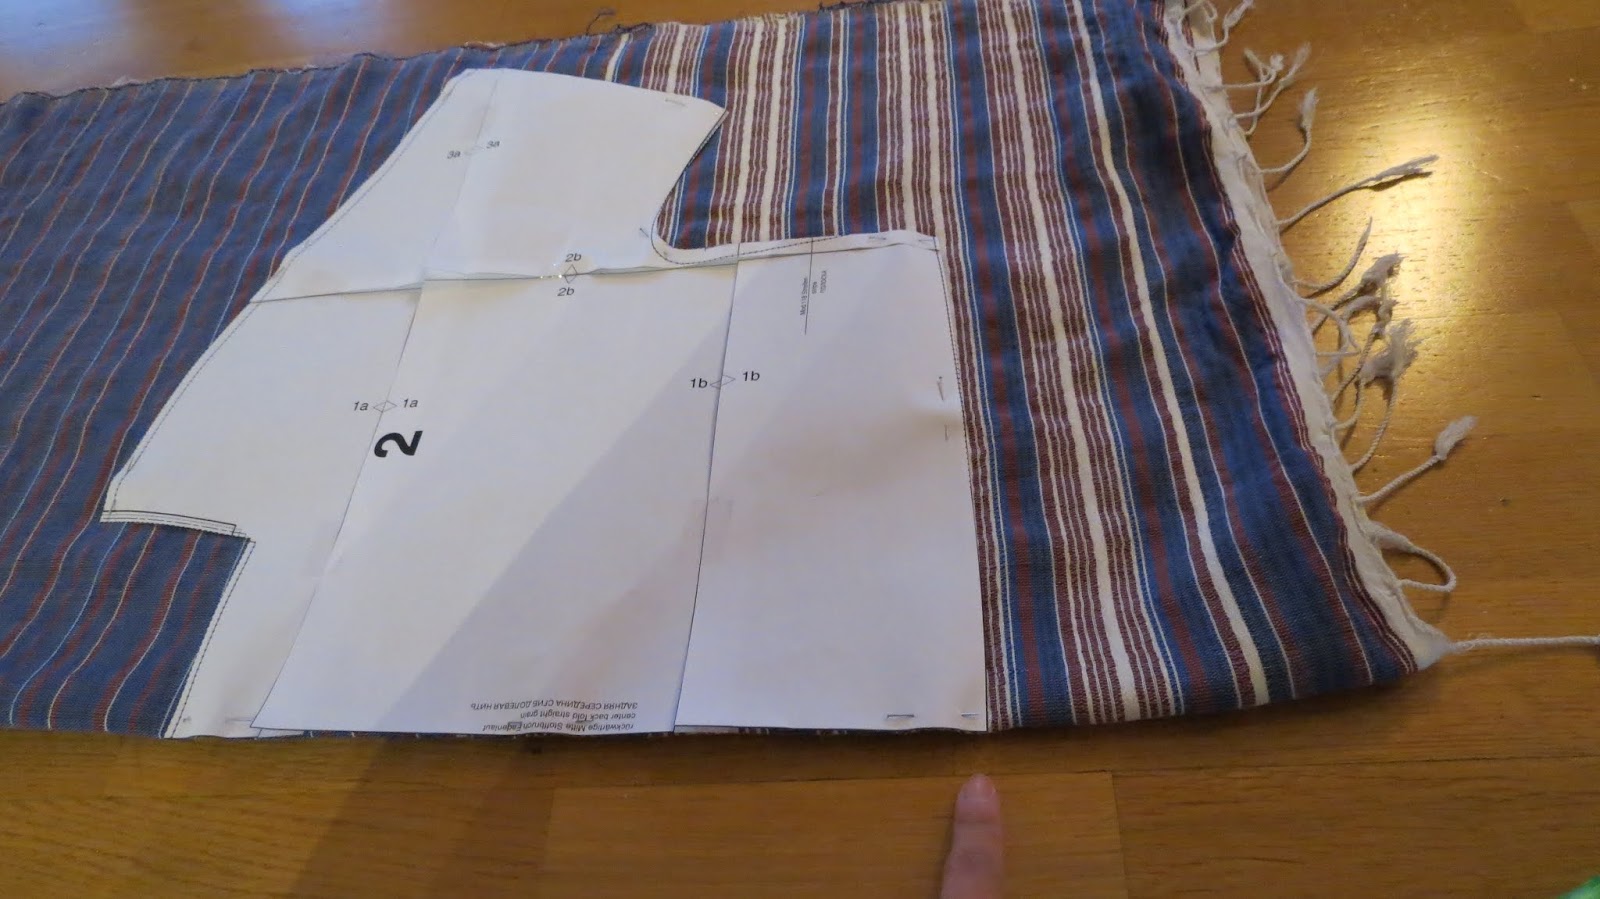
You might think why would I want to do that? And I wouldn't blame you, I love me a rounded hem too, but sometimes the fabric dictates it like my stripy fabrics with tassels on one end.
One thing to keep in mind is how the sides go down to the hem. If it's more or less straight from the waist to the hem, then it's just a matter to find the desired length and draw a straight line across. But if it tapers out like in this pattern:
Then you need to think a bit differently, but it's still very simple...
Here's what to do:
- Make a marking at the side seam where the highest bust point is on the front piece and at the corresponding point on the back piece.
- Draw a line from that point parallel to the center front/back seam all the way down to the hem, and fold or cut away the excess.
- Now find the correct length for your garment and draw a line across the pattern pieces that is perpendicular to the center front/back and side seams.
Note that this method might not work if you want the garment to go beyond the hips, make sure the pattern is wide enough to accommodate your hips in such case π.
One thing to keep in mind is how the sides go down to the hem. If it's more or less straight from the waist to the hem, then it's just a matter to find the desired length and draw a straight line across. But if it tapers out like in this pattern:
Here's what to do:
- Make a marking at the side seam where the highest bust point is on the front piece and at the corresponding point on the back piece.
- Draw a line from that point parallel to the center front/back seam all the way down to the hem, and fold or cut away the excess.
- Now find the correct length for your garment and draw a line across the pattern pieces that is perpendicular to the center front/back and side seams.
Note that this method might not work if you want the garment to go beyond the hips, make sure the pattern is wide enough to accommodate your hips in such case π.
Tuesday, 6 March 2018
Draft a lining for a hoodie
A few months ago I made a bomber jacket with a hood for my little nephew, but I didn't like that the hood was not lined. It didn't look professional enough I felt, so I went and drafted a lining for it and decided to share this in case some sewing beginners find it useful π
The pattern I used was Burda Kids 9399 View C. This comes with a hood that has an integrated facing but no lining for the rest of it. The fabric I used for the hood was velveteen and the back side of that isn't exactly attractive to the eye...Hence the lining.
The pattern piece for the hood looks like this:
Sunday, 12 November 2017
Make your own pipings
I lately made myself a blouse with quite a bit of piping. I didn't have any at home, and the fabric store is a 25 min. drive away. So I decided to try to make it myself with what I have.
I had some leftovers of yellow cotton/polyester poplin from an earlier project. But I couldn't find anything to pipe with. Luckily the hobby store is only 5 min. away by car and they had polyester cord in the right thickness for just Kr. 5 a meter π
So here's what I did:
1- I measured a length of the cord that is enough for the seam line.
Monday, 4 September 2017
Diary of a shirt dress: Days 7&8
It's Wednesday and I actually have some evening time to use on the dress. It might seem it's not much left on it, and piece-wise it's true, but it's mostly pieces that require a bit of attention to detail.
Today I worked on the button panel running down the center front. I didn't have enough of the same fabric to make the right and left panels, so I only have the right panel (the one that'll be on top) cut out of the main fabric, while the left panel is cut out of the same green cotton sateen I used for the inner waistband. Well, it'll be mostly invisible anyway. I interfaced both.
But oh no! The right panel isn't long enough! Improvise...improvise! OK! A piece from another part of the main fabric will have to do. I measure this out, cut it and interface it. This one goes on the bottom, the planned bit goes from the neckline as far down as it reaches and I stitch both in place. Then I fold the bottom bit to make my panel piece, then fold the seam allowance to wrong side, and top stitch the edge catching the inner part. I also top stitch the folded edge.
At the place where the planned panel meets the unplanned little one, I fold the planned one in a triangular shape much like a tower placket. At least this way people might think it's a design feature π! Then I fold the planned panel in half, press the inner seam allowances to inside and also top stitch the inner part in place. But here I also top stitch down the triangle side and up again on the folded side in a continuous line, again...to strengthen the illusion of a design feature.
The left side panel is long enough as is, so this is simpler. Just sew it as normal.
Next it's the collar stand. I'm unsure how this will behave if I only interface the outer one, so I do both. Then sew it as normal: Sew them right sides together along the top and sides, turn right side out and press, then sew the outer bottom seam to the neckline, fold the seam allowances of the inside stand to wrong side, pin in place and top stitch from the right side.
I've considered out of laziness, dislike of buttonhole making and lack of matching buttons in my stash to go buy some snaps. But got lazy even for that especially that I didn't have much time to spare on trips to the fabric store, and ended up biting the bullet and making those detested button holes. I made those from the collar to the waistband on Wednesday.
I decided to use large crystal beads for buttons, and Thursday started with me sewing these for the buttonholes I made yesterday.
Now I could close the dress around the waist and decide on the length. And hem the dress. Then do the remaining buttonholes below the waistband. This added up to 21 buttonholes in total π¬. Did I sew the remaining buttons (and move the waistband button as this ended up off the correct place)? Of course not. I packed buttons, thread and needle together with the dress. I'll do that in Italy...
Saturday, 2 September 2017
Diary of a shirt dress: Days 5&6
The week has started and I’m back to using the evenings for
not only sewing but also studying/researching for my business.
I didn’t mention my business before? No?! I’m working on
getting myself ready for starting an online fabric store beginning of next
year. My base product is Egyptian cotton fabric, in all possible variations (Woven,
jeans, knits, name it!), but I'll have more than that. So, if you’re interested, watch this space π
Some extra info and a survey that'd really help if you fill are available here.
There’s of course a lot to get up to speed with relating to
laws, rules, and business in general, which leaves me little time to do other
things in the evening, but I do sneak in some sewing/crocheting/knitting/embroidery
every now and then.
Monday has come and I took some time for that. Today I connected
the bodice to the skirt. I applied interfacing to the outer waistband.
Then gathered the bottom of the bodice and stitched it to
the top of the outer waistband.
I then gathered the top of the skirt and stitched it to the
bottom of that same waistband.
And that was it for Monday. On Tuesday, I was actually on an
evening course until 8 in the evening so there wasn’t that much time to achieve
anything. But I did the inner waistband! I stitched the top of it right sides facing with the top of the outer such that the bodice ends up sandwiched in between, then turned the seam allowances of the bottom to the wrong side,
pinned to the bottom of the outer waistband, pressed, and stitched from the
right side along the existing (bottom of outer waistband and top of skirt) seam.
Then went to bed…Tomorrow is a new day. Good night π
Sunday, 27 August 2017
Diary of a shirt dress: Day 4
Sunday is here and the dressmaking is continuing again. After doing the skirt side seam, it's time to insert the pockets. Which was what I did first today.
Diary of a shirt dress: Day 3
Yaay! It's the weekend and I can finally continue working on my dress!
I have most of the design details figured out now, so I'll just start cutting.
The natural place to start was of course the skirt. This will be where most of the fabric goes and where the print really comes to life. I spent some minutes first tying to lay the fabric as straight as possible. Now I've already figured out earlier (on day 2 π) that the skirt will be made of two triangles 75cm wide x ~105cm long. Technically this is not very true as the front will be split in 2 because of the button closure.
But starting with the back of the skirt, and taking into account 2cm for the hem, I marked a rectangle 110cm long (105 + 2 for hem + 3 as error margin) by 75cm wide, and cut it taking into account seam allowances on sides and top edges.
Friday, 18 August 2017
Diary of a shirt dress: Day 2
Oh! I just so hope I don't mess this project up! It's be a shame.
By now it's clear that the day count doesn't correspond to actual days. Some days I don't sew. Today I won't actually sew either, I'm going out soon. Friday night!
But I did do some preparation work:
By now it's clear that the day count doesn't correspond to actual days. Some days I don't sew. Today I won't actually sew either, I'm going out soon. Friday night!
But I did do some preparation work:
Wednesday, 16 August 2017
Diary of a shirt dress: Day 1
The reason I decided to write about this dress in the form of a diary is the amount of excitement around it. I've been psyching myself up to it for quite a while now. I was hoping to get it done before the summer to wear it during the summer but so many other things got in the way, especially things I promised to sew for others and that ended up on a schedule because of travel plans etc...Well, better late than never.
So today after getting back from work and putting the finishing touches to the blouse I've been working on (coming soon to the blog of course), I started thinking about this dress again. Now I'll make it! And will take it with me on vacation in 2.5 weeks time!
Saturday, 12 August 2017
Sewists of the world! I need your help!
I've been thinking this over for a while and now I have decided! I'm opening an online fabric store!
I'm starting with different kinds of woven and knit fabrics made of Egyptian cotton, but planning already to have other natural fibers in the future as well as sewing supplies (buttons, threads, zips, maybe even sewing patterns etc...)
The shop will be based in Norway since I live here, but will ship worldwide. And one of my main goals is to keep the shipping costs down.
I've been out there buying from online stores myself and have taken a lot of pluses and minuses into consideration while thinking this one out so hopefully you'll all like it. But there's only one way to find out: You have to tell me yourself!
So I'd like to invite all of you that sew to take 10 minutes of your time and answer a little survey I created. You can take it in English or Norwegian. And the best part?
πThere's fabric to winπ
3 winners will be drawn and each will get 2m of cotton fabric! But if the participation exceeds expectation, I'll increase the number of winners as well.
And if you want to double your chances to win, head over to my Instagram account and repost my cry for help there (more details in the IG post).
Thank you all in advance and good luck!
(picture from http://www.cottontextiles.co.uk/egyptian-cotton-fibre-is-smaller-in-diameter-but-very-strong.html)
Sunday, 16 July 2017
Create fold up effect hem
This is a very cool looking detail on cigarette pants (you know the type that becomes narrower towards the foot but isn't skinny). It gives this relaxed casual look.
This was another detail on the Seamwork Moji trousers I wanted to recreate. With a bit of logic and a bit of imagination, I managed π.
Tuesday, 11 July 2017
Narrow your trousers hem
Have you ever had this pattern or pair of trousers that fit you nicely around the hips and thighs but you wished they tapered more towards your foot? In this post I'll show you how you can achieve this.
Let's start from a simple pattern drawing. Piece 1 is the front leg pattern, piece 2 is the back leg pattern.

If you want to shorten of lengthen the pattern, do that first, then follow the steps below:
3- Now measure around your leg where the hem will be, we'll call this C, also point your foot and measure around the biggest bit where the heel is, we'll call this D. You need to manage to get the trousers past this point when you put them on π.
4- For this to look good, I recommend adding 6-8 cm to C, let's say we'll use 8cm. Now calculate Y.
If C+8 is equal to or greater than D, then Y=C+8.
If C+8 is less than D, then Y=D.
5- Now we need to reduce X to Y and do this proportionally, so next comes a bit of math so concentrate! π
6- New front hem length E=A×Y÷X, New back hem length F=Y-E.
7- Mark a distance (A-E)÷2 from each side of the front leg pattern.
8- Likewise mark a distance (B-F)÷2 from each side of the back leg pattern.
9- Most commercial patterns have knee positions marked, if not, hold the front leg pattern to you and mark the middle of your knee on the pattern, measure from hem to this mark and mark accordingly on the back leg pattern.
10- Draw a straight line from the marks made in steps 7 & 8 to the knee marks.
11- Fold along these newly drawn lines or cut away outside them, and use the modified pattern pieces.
The same can be done on your pair of sewn or RTW trousers as well, you can mark straight on the pants and sew along the new lines.
Enjoy!
And leave me a comment below if you have any comments or questions π
Let's start from a simple pattern drawing. Piece 1 is the front leg pattern, piece 2 is the back leg pattern.

If you want to shorten of lengthen the pattern, do that first, then follow the steps below:
1- Measure the hem on the front and back pattern pieces, A and B on the image below.
2- Calculate X=A+B

If C+8 is equal to or greater than D, then Y=C+8.
If C+8 is less than D, then Y=D.
5- Now we need to reduce X to Y and do this proportionally, so next comes a bit of math so concentrate! π
6- New front hem length E=A×Y÷X, New back hem length F=Y-E.
7- Mark a distance (A-E)÷2 from each side of the front leg pattern.

8- Likewise mark a distance (B-F)÷2 from each side of the back leg pattern.
9- Most commercial patterns have knee positions marked, if not, hold the front leg pattern to you and mark the middle of your knee on the pattern, measure from hem to this mark and mark accordingly on the back leg pattern.
10- Draw a straight line from the marks made in steps 7 & 8 to the knee marks.
11- Fold along these newly drawn lines or cut away outside them, and use the modified pattern pieces.
The same can be done on your pair of sewn or RTW trousers as well, you can mark straight on the pants and sew along the new lines.
Enjoy!
And leave me a comment below if you have any comments or questions π
Saturday, 8 July 2017
Create patch pockets
Patch pockets look good and are so easy to make! You can choose the shape and size you want and from there it's just a few simple steps to make it happen.
Sunday, 2 July 2017
Eliminating gathers in a garment
Before you do this, you have to make sure this doesn't change (significantly) the fit of your garment! Some gathers are there not only as decorative details but as an essential detail for proper fit. In case of the latter, you can't just eliminate them, you have to go with them or transform them to pleats (but that's another topic).
Subscribe to:
Posts (Atom)