Sunday 26 November 2017

Cool wool trousers


This was one of those spur of the moment projects. As a lot of you know already I'm working on starting a little business selling fabric online.

Sunday 19 November 2017

Bella Italia: Como and last day in Italy


Yes, our vacation in Italy was coming to an end. We had one day left and no plans. Lake Como came up as a potential place to visit in the beginning of the vacation, we thought we'll spend the last day there, especially that it was close enough to Milan (our departure airport).

Sunday 12 November 2017

The Cat blouse


I love cats! I have two that I love to the point that my husband is convinced that if I had to choose between him and the cats, it'll be him packing 😂.

Make your own pipings

I lately made myself a blouse with quite a bit of piping. I didn't have any at home, and the fabric store is a 25 min. drive away. So I decided to try to make it myself with what I have.

I had some leftovers of yellow cotton/polyester poplin from an earlier project. But I couldn't find anything to pipe with. Luckily the hobby store is only 5 min. away by car and they had polyester cord in the right thickness for just Kr. 5 a meter 😁

So here's what I did:

1- I measured a length of the cord that is enough for the seam line.


Sunday 5 November 2017

My first knitting attempt or last summer project


If you know me personally, you'll know that I get bored of stuff and like to try new stuff all the time. And now that cross stitching, sewing and crochet are mastered to a certain degree, I decided to introduce knitting in my life.

Sunday 29 October 2017

Dress? Top? Madness?


This project was the result of a product review I did for Minerva Crafts. I got this thick padded jersey and went all experimental on it! I decided to try to make a tight sitting dress with this, so I started by using a pattern for the neckline, shoulder seams and armholes (that was New Look 6808, beautiful pattern by the way!) and legging it from there on.

Thursday 19 October 2017

Bella Italia: Lake Garda

Lake Iseo
After getting our bag from the outskirts of Milano, we started our journey towards lake Garda. We like to take the smaller more scenic routes when we travel like this. It's a lot more fun to look around, enjoy the sites, maybe find a viewpoint here or there than drive the motorways.

Lake Iseo
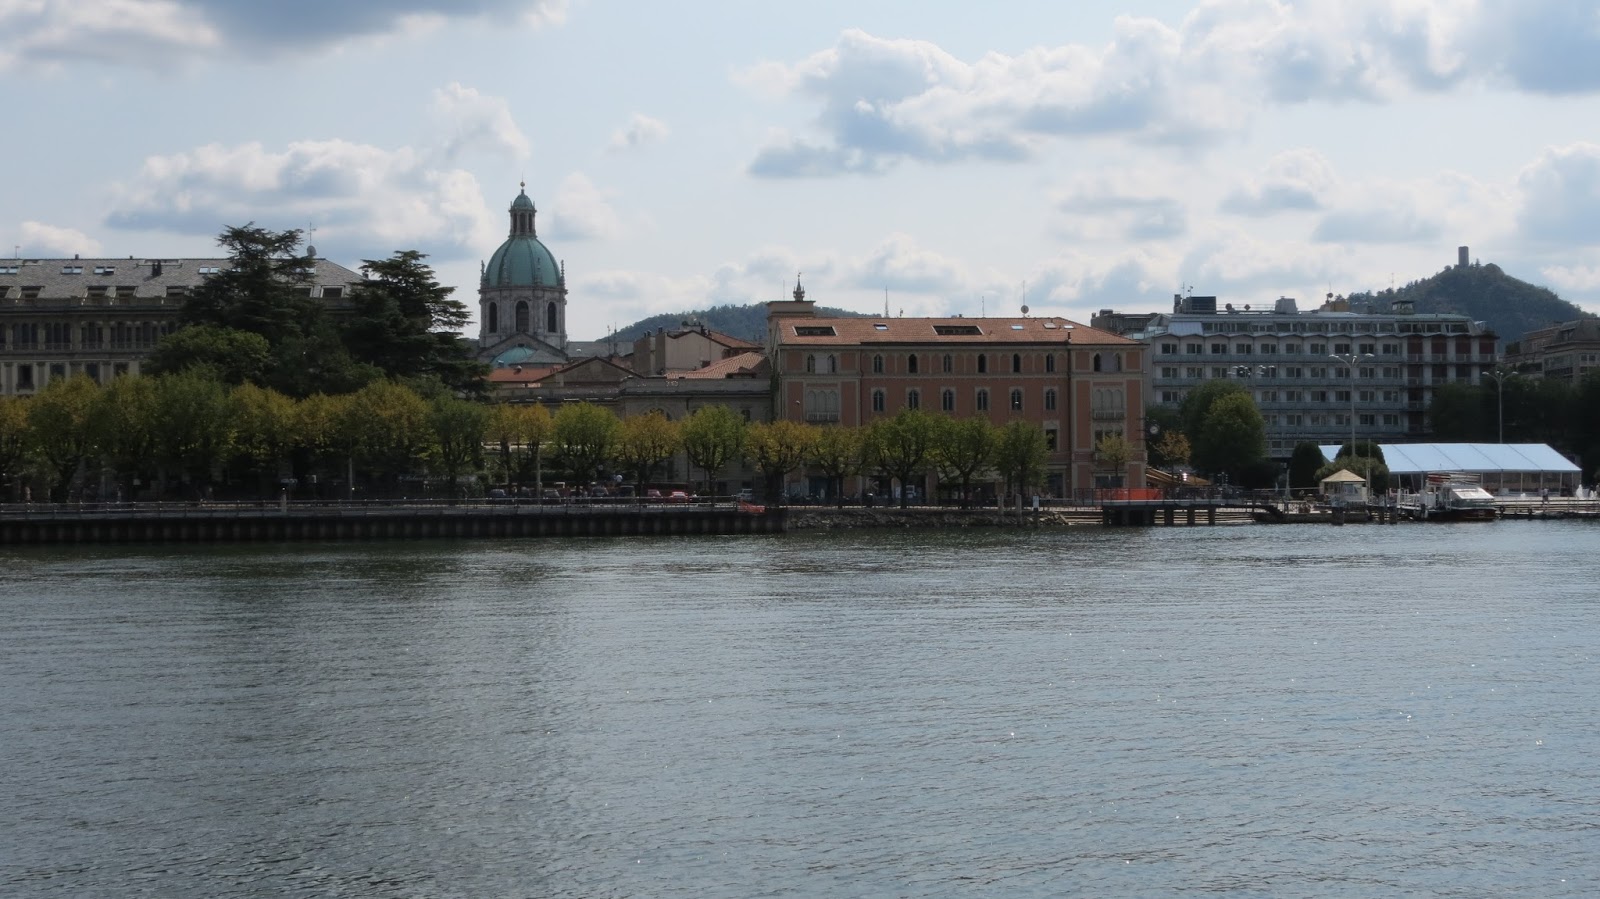
My husband and I are a good team when it comes to this. He plans routes and becomes my GPS man and I drive. He planned this one so we passed by another lake on the way: Lake Iseo. Surrounded by a little slightly abandoned looking town but charming none the less, probably because it's so close to Milano that it's only a summer destination and this was already September, but it's really beautiful! The water, the mountains on the other shore, the little marina and all the little cafes by the water. We stopped for photos, took a look around and had lunch in one of those cafes before continuing our journey to Garda. We basically spent the day on the road and reached the hotel by sunset, were welcomed by the cutest member of the family: Perla the cat 😄 (of whom unfortunately I have no photos...), checked in and went for dinner by the lake, the temperature was good, the food was good, generally a good end to the day. Day 4 dinner: Not pizza!

Somewhere on the way to Garda
Out little family owned bed and breakfast was really cute! Though our room was slightly too small (we didn't have a place to put our bag without having to step over it on the way out or to the bathroom, but it was nice, the man owning this place is also a chef, so breakfasts exceeded expectations, and they had such a view over Garda 😍. We've booked two nights, but decided we want to stay here until the end of the vacation. They didn't have the room for 2 extra nights, but we still extended by one. Not bad.

Toscolano Maderno (or somewhere very close)

The plan for day 5 was to drive around the lake and go up Mount Baldo. As usual, we took the smaller roads by the sea: Drove through Salo, Toscolano Maderno, Limone del Garda (yes, it means what you think it means 😃), Riva del Garda, Torbole and Malcesine where the cable car is. The drive was beautiful! All these little towns by the water, the road by the water, the mountains around...I simply fell in love with Garda.

Lake Garda
The queue for the cable car was loooooooooooooooong, very long! We stood there forever! But finally made it up. The day started fogging already on our way here, so by the time we came up, we could see nothing. We had lunch here, bought some water and a small snack and decided to walk back down. Let me tell you it's not for the fainthearted! Baldo is steep, the walk is long, and the amount of flat bits is very limited. It's around 10Km that take about 3 hours. And when you've passed 2 and your legs and feet are screaming, the forest tracks turn to asphalt 😒. It was such a relief when we finally came down and had to walk up a slight uphill to the car, it was delightful to go up 😁!

Lake Garda
But the views from the mountain are gorgeous! About half way down the fog also cleared and you could see the town of Malcesine, the shimmery surface of the lake and the castle by the lake in the town of Malcesine. Would I do this again? Doubt it. Was it worth it that one time? Yeah.

Mount Baldo
This would've been a great point in time to dip into the lake, but unfortunately we haven't thought of that earlier, so didn't have clothes or towels to do that. Oh! It would've done miracles for my knackered feet...But anyway, we were also quite hungry by now so we drove back to Riva del Garda to have dinner. Just one of many very pretty and cozy little towns surrounding the lake, we walked a bit around its narrow streets then found a restaurant and sat down to eat. Day 5 dinner: Pizza!

Mount Baldo
Walking was a challenge the next day but we didn't have big plans of climbing up or down anywhere. Today's plan was to walk around Sirmione and go for that swim in the lake. Weather forecast said a storm was coming but the morning still looked sunny and nice. Sirmione is a narrow bit of land jutting into the lake at the south end of it, and it was more popular than expected. The amount of people here! We had to park quite far from the little bridge to Sirmione but it was a nice walk in good weather so we had nothing against that.

Malcesine
The concept here is the same, old houses, narrow streets and a little fort right after you cross the bridge (there is a piece of land but it connects to this fort only). It felt more colorful though. And once you pass through the hustle and bustle of the town, there's gardens, a church and a beautiful though rocky beach.

Riva del Garda
We found a hotel with a cafe over the water and stopped for a coffee (and strawberries with creme for me 😊), watched the hydrofoil boats coming and going (this is super exciting for an engineer by the way), enjoyed the warm weather and just had a great time. Then walked around some more, took some photos of a knitting project of mine that you'll see soon but decided we won't be swimming here.

Sirmione
That we decided to do on Spiaggia Toscolano in Toscolano Maderno, we had lunch there then a dip in the water. Don't let the warmth of the weather deceive you, the water is cold! Not something that gets in my way though, I swim in colder fjords here but still.

Sirmione
This was also the first time I swam in fresh water, I've been warned against it since I was a child, but a bit of googling and assertion from my husband put me enough at ease to try. It's safe to do it in most of Europe apparently. And it was a nice swim (with ducks 😃), and just as we dried a bit on the beach, the predicted storm started forming, but we made it to the car before the rain started and got back to the hotel. Dinner tonight was in a fancy restaurant called Capriccio and the food was awesome! So Day 6 dinner: Far from pizza!

Church in Sirmione
Hotel: Hotel Florence B&B in Manerba del Garda.
Impression: Very cozy, loved the breakfast, loved the view, loved Perla the cat.

Wednesday 11 October 2017

Bella Italia: Pisa


This was an unplanned spur of the moment thing. I discovered Pisa was nearby looking at the maps at some point and made bambi eyes at my husband to stop by (although it wasn't on the route at all).

Sunday 8 October 2017

Bella Italia: Florence

Florence from the top of the Bell tower

Italy is a country I more or less dreamed of as a child. While everyone around me wanted to visit England, France, USA, it's Italy I really wanted to see. I can't give you a good reason why, probably media, football, etc combined into something positive and pleasant in the back of my head somewhere that persisted until this day.

Sunday 24 September 2017

My Paris/Asker/Athens blouse


This blouse might not be my best make, but it is nevertheless very special to me. Because this is a blouse with a story.

Saturday 16 September 2017

Diary of a shirt dress: The reveal!


And it's finally done! And I love it!

I sewed in the remaining buttons while on vacation in Italy and took photos.

Monday 4 September 2017

Diary of a shirt dress: Days 7&8

It's Wednesday and I actually have some evening time to use on the dress. It might seem it's not much left on it, and piece-wise it's true, but it's mostly pieces that require a bit of attention to detail.

Today I worked on the button panel running down the center front. I didn't have enough of the same fabric to make the right and left panels, so I only have the right panel (the one that'll be on top) cut out of the main fabric, while the left panel is cut out of the same green cotton sateen I used for the inner waistband. Well, it'll be mostly invisible anyway. I interfaced both.

But oh no! The right panel isn't long enough! Improvise...improvise! OK! A piece from another part of the main fabric will have to do. I measure this out, cut it and interface it. This one goes on the bottom, the planned bit goes from the neckline as far down as it reaches and I stitch both in place. Then I fold the bottom bit to make my panel piece, then fold the seam allowance to wrong side, and top stitch the edge catching the inner part. I also top stitch the folded edge.


At the place where the planned panel meets the unplanned little one, I fold the planned one in a triangular shape much like a tower placket. At least this way people might think it's a design feature 😄! Then I fold the planned panel in half, press the inner seam allowances to inside and also top stitch the inner part in place. But here I also top stitch down the triangle side and up again on the folded side in a continuous line, again...to strengthen the illusion of a design feature.

The left side panel is long enough as is, so this is simpler. Just sew it as normal.


Next it's the collar stand. I'm unsure how this will behave if I only interface the outer one, so I do both. Then sew it as normal: Sew them right sides together along the top and sides, turn right side out and press, then sew the outer bottom seam to the neckline, fold the seam allowances of the inside stand to wrong side, pin in place and top stitch from the right side.


I've considered out of laziness, dislike of buttonhole making and lack of matching buttons in my stash to go buy some snaps. But got lazy even for that especially that I didn't have much time to spare on trips to the fabric store, and ended up biting the bullet and making those detested button holes. I made those from the collar to the waistband on Wednesday.

I decided to use large crystal beads for buttons, and Thursday started with me sewing these for the buttonholes I made yesterday.

Now I could close the dress around the waist and decide on the length. And hem the dress. Then do the remaining buttonholes below the waistband. This added up to 21 buttonholes in total 😬. Did I sew the remaining buttons (and move the waistband button as this ended up off the correct place)? Of course not. I packed buttons, thread and needle together with the dress. I'll do that in Italy...

Saturday 2 September 2017

Diary of a shirt dress: Days 5&6

The week has started and I’m back to using the evenings for not only sewing but also studying/researching for my business.

I didn’t mention my business before? No?! I’m working on getting myself ready for starting an online fabric store beginning of next year. My base product is Egyptian cotton fabric, in all possible variations (Woven, jeans, knits, name it!), but I'll have more than that. So, if you’re interested, watch this space 😊
Some extra info and a survey that'd really help if you fill are available here.

There’s of course a lot to get up to speed with relating to laws, rules, and business in general, which leaves me little time to do other things in the evening, but I do sneak in some sewing/crocheting/knitting/embroidery every now and then.

Monday has come and I took some time for that. Today I connected the bodice to the skirt. I applied interfacing to the outer waistband.

Then gathered the bottom of the bodice and stitched it to the top of the outer waistband.

I then gathered the top of the skirt and stitched it to the bottom of that same waistband.

And that was it for Monday. On Tuesday, I was actually on an evening course until 8 in the evening so there wasn’t that much time to achieve anything. But I did the inner waistband! I stitched the top of it right sides facing with the top of the outer such that the bodice ends up sandwiched in between, then turned the seam allowances of the bottom to the wrong side, pinned to the bottom of the outer waistband, pressed, and stitched from the right side along the existing (bottom of outer waistband and top of skirt) seam.


Then went to bed…Tomorrow is a new day. Good night 😊

Sunday 27 August 2017

Diary of a shirt dress: Day 4

Sunday is here and the dressmaking is continuing again. After doing the skirt side seam, it's time to insert the pockets. Which was what I did first today.


Diary of a shirt dress: Day 3

Yaay! It's the weekend and I can finally continue working on my dress!
I have most of the design details figured out now, so I'll just start cutting.

The natural place to start was of course the skirt. This will be where most of the fabric goes and where the print really comes to life. I spent some minutes first tying to lay the fabric as straight as possible. Now I've already figured out earlier (on day 2 😄) that the skirt will be made of two triangles 75cm wide x ~105cm long. Technically this is not very true as the front will be split in 2 because of the button closure.

But starting with the back of the skirt, and taking into account 2cm for the hem, I marked a rectangle 110cm long (105 + 2 for hem + 3 as error margin) by 75cm wide, and cut it taking into account seam allowances on sides and top edges.

Saturday 26 August 2017

A cardigan for the Norwegian summer / I dye for the first time


Actually this project was started in April and finished in May. I signed up to be a product tester for Minerva Crafts early this year and this is the project I made for my first review.

Thursday 24 August 2017

Graffiti bomber (or bomber jacket v2)


Not so long ago I made myself a bomber jacket. It got so many compliments and I even got requests from mostly family and a friend to make them similar ones. 😊

Friday 18 August 2017

Diary of a shirt dress: Day 2

Oh! I just so hope I don't mess this project up! It's be a shame.

By now it's clear that the day count doesn't correspond to actual days. Some days I don't sew. Today I won't actually sew either, I'm going out soon. Friday night!

But I did do some preparation work:


Wednesday 16 August 2017

Diary of a shirt dress: Day 1

The reason I decided to write about this dress in the form of a diary is the amount of excitement around it. I've been psyching myself up to it for quite a while now. I was hoping to get it done before the summer to wear it during the summer but so many other things got in the way, especially things I promised to sew for others and that ended up on a schedule because of travel plans etc...Well, better late than never.

So today after getting back from work and putting the finishing touches to the blouse I've been working on (coming soon to the blog of course), I started thinking about this dress again. Now I'll make it! And will take it with me on vacation in 2.5 weeks time!


Tuesday 15 August 2017

Rush dress but surprisingly good dress


If you follow me on Instagram (hayek.m83), you know by now that I have loads of projects in progress. This was NOT one of them.

One of my best friends got married recently, and I couldn't decide whether I wanted a new dress to wear to his wedding or not, and in the end decided not to make one. Until the last day before the wedding that is 👀. But since the time left was one evening, the following set of requirements materialized:
- It has to be a simple quick to sew pattern.
- I have to have this pattern in my collection already.
- I have to have all the required fabrics and supplies.

Saturday 12 August 2017

Sewists of the world! I need your help!


I've been thinking this over for a while and now I have decided! I'm opening an online fabric store!

I'm starting with different kinds of woven and knit fabrics made of Egyptian cotton, but planning already to have other natural fibers in the future as well as sewing supplies (buttons, threads, zips, maybe even sewing patterns etc...)

The shop will be based in Norway since I live here, but will ship worldwide. And one of my main goals is to keep the shipping costs down.

I've been out there buying from online stores myself and have taken a lot of pluses and minuses into consideration while thinking this one out so hopefully you'll all like it. But there's only one way to find out: You have to tell me yourself!

So I'd like to invite all of you that sew to take 10 minutes of your time and answer a little survey I created. You can take it in English or Norwegian. And the best part?

👉There's fabric to win👈

3 winners will be drawn and each will get 2m of cotton fabric! But if the participation exceeds expectation, I'll increase the number of winners as well.

And if you want to double your chances to win, head over to my Instagram account and repost my cry for help there (more details in the IG post).

Thank you all in advance and good luck!

(picture from http://www.cottontextiles.co.uk/egyptian-cotton-fibre-is-smaller-in-diameter-but-very-strong.html)

Sunday 6 August 2017

Dream trousers (Embroidered cotton trousers)


About a year and a half ago I moved from buying fabric for a specific project in mind, to buying fabrics I loved at the shops and then decide later what I make with it. Sometimes I had a vague idea of what to make, sometimes not at all. Some months ago though I started feeling bad about all the fabrics in my stash and decided not to buy anything without a predefined project and to start stash busting, although I did develop a new habit of buying one piece of fabric from any new land I travel to, then it carries a nice memory. And that I don't feel bad about.

Wednesday 26 July 2017

Bomber jacket and I love it!


After sewing my last pair of trousers I got so exhausted that I wanted to sew something simple and straightforward. Not because the trousers were difficult, not at all, they were really simple, but because of all the blog posts that resulted from them 😂 (I wrote 4! A normal one and 3 tutorials). Those were a bit of work.

Wednesday 19 July 2017

Crocheted Froggie


During my last trip to Egypt in June, I tried my hand at crocheting toys as you might have already read in my post about the bunny. Then you'd also know that I used the bunny to train for bigger things. And here it is: The frog! 😀

Half was through this frog I realized I was using the wrong stitch and the frog was growing extremely long! I stopped, scratched my head, googled a bit then undid and redid using the correct stitch. Again, if you read about the bunny, you know I haven't bothered to redo that, but the frog would've looked awful otherwise 😂.


The scarf was made by my mom who decided to give me a bit of a hand.

This little guy is also based on a pattern from Stoff & Stil, all yarn is also from there apart from that used for the scarf, it was leftovers from my mom's stash.


And although this frog looks way better (and more professional) than the bunny, and although everybody in the family loved it, the bunny is still me nephew's favorite. And I'm fine with that.

Monday 17 July 2017

Summer delight trousers a.k.a How to make Seamwork Moji from a Burda pattern?


I love Seamwork's Moji trousers! I've been looking at this pattern forever and really wanted to make it. But I have to admit...I'm cheap when it comes to patterns. Moji costs $12. I stopped buying the $5.99 patterns from the American Burda site because I speak Russian and they cost under $3 on the Russian Burda site (and they have loads of sales). So $12 was super expensive in my book.

Sunday 16 July 2017

Create fold up effect hem


This is a very cool looking detail on cigarette pants (you know the type that becomes narrower towards the foot but isn't skinny). It gives this relaxed casual look.

This was another detail on the Seamwork Moji trousers I wanted to recreate. With a bit of logic and a bit of imagination, I managed 😄.

Tuesday 11 July 2017

Narrow your trousers hem

Have you ever had this pattern or pair of trousers that fit you nicely around the hips and thighs but you wished they tapered more towards your foot? In this post I'll show you how you can achieve this.

Let's start from a simple pattern drawing. Piece 1 is the front leg pattern, piece 2 is the back leg pattern.

If you want to shorten of lengthen the pattern, do that first, then follow the steps below:

1- Measure the hem on the front and back pattern pieces, A and B on the image below.

2- Calculate X=A+B

3- Now measure around your leg where the hem will be, we'll call this C, also point your foot and measure around the biggest bit where the heel is, we'll call this D. You need to manage to get the trousers past this point when you put them on 😃.

4- For this to look good, I recommend adding 6-8 cm to C, let's say we'll use 8cm. Now calculate Y.
If C+8 is equal to or greater than D, then Y=C+8.
If C+8 is less than D, then Y=D.

5- Now we need to reduce X to Y and do this proportionally, so next comes a bit of math so concentrate! 😜

6- New front hem length E=A×Y÷X, New back hem length F=Y-E.

7- Mark a distance (A-E)÷2 from each side of the front leg pattern.


8- Likewise mark a distance (B-F)÷2 from each side of the back leg pattern.

9- Most commercial patterns have knee positions marked, if not, hold the front leg pattern to you and mark the middle of your knee on the pattern, measure from hem to this mark and mark accordingly on the back leg pattern.

10- Draw a straight line from the marks made in steps 7 & 8 to the knee marks.

11- Fold along these newly drawn lines or cut away outside them, and use the modified pattern pieces.

The same can be done on your pair of sewn or RTW trousers as well, you can mark straight on the pants and sew along the new lines.

Enjoy!
And leave me a comment below if you have any comments or questions 😊